Showing posts with label side dish. Show all posts

Thursday, December 2, 2010

Ethiopian cabbage and potatoes

Over the summer my husband and I received most of our produce from the local CSA we joined. It was an interesting experience, but the jury is still out on whether we'll join again next year or buy weekly from the Farmer's Market.

One of the vegetables we received in abundant supply was cabbage. Oh, the cabbage. Now, I like cabbage, I do, but 3-4 meals worth per week for 3-4 weeks - well, that was a LOT of cabbage.

Luckily, my favorite recipe website (besides this one of course) came through with this recipe for me. And it is awesome. Positively my favorite way to eat cabbage now.

However, I must warn you, this does not fall in the category of Quick & Easy. Not at all. The dish itself is not difficult to make but it is time consuming. It's worth it though because the taste is unparalleled in the world of cabbage recipes.

If you have a Cuisinart, you'll definitely want to use it.

Here's what you'll need:


1/4 cup olive oil
4 carrots, thinly sliced
1 onion, thinly sliced
1 teaspoon sea salt
1 teaspoon black pepper
1 teaspoon ground cumin
1/2 teaspoon ground turmeric
1/2 head of cabbage, shredded
5 potatoes peeled and cut into 1-inch cubes
(note: it is important to cut the potatoes small; if they are too big they'll take too long to cook)

Heat the olive oil in a skillet over medium heat.

Cook the carrots and onion in the hot oil about 5 minutes.


Stir in the salt, pepper, cumin, turmeric, and cabbage and cook another 15 to 20 minutes.


Add the potatoes; cover. Reduce heat to medium-low and cook until potatoes are soft, 20 to 30 minutes. (I usually add a little bit of water to the pan to help the potatoes cook faster.)

This makes an excellent side dish or, as was often the case here, a delicious meal all by itself.

Saturday, July 10, 2010

Lemon basil bowtie pasta salad

I love this summer side dish. It's just right for a light lunch, or as an accompaniment to grilled chicken or fish.

Here's what you need:
1 box of bowtie pasta
1 bunch of baby asparagus
1 bag of frozen peas
@ a handful of sundried tomatoes (I used the ones NOT packed in oil)
@ a small handful of fresh basil, chopped
Juice of one large lemon or two small ones
@ two tablespoons of basil olive oil (if you can't find the infused oil, substitute plain olive oil)
salt/pepper to taste

Wash the asparagus and cut the ends; then grill until just tender. I did mine stovetop on the grill pan, drizzling with just a tiny bit of olive oil as they cooked.
Set aside to cool, then cut into inch long (or bite size) pieces.

You can either leave the peas to defrost on their own, or steam them quickly in the microwave. If you steam them, set them aside to cool. Chop the sundried tomatoes into bite size strips.

While you are preparing the vegetables, set a large pot of water to boil and cook the pasta according to package directions. When the pasta is ready, drain and drizzle with a bit of olive oil to prevent sticking.

Once all the ingredients have cooled to room temperature, toss the pasta and vegetables together in a large bowl. Add the lemon and basil oil, chopped fresh basil, salt and pepper to taste. A word on the lemon: be generous. If you feel like you can't taste the citrus, add more. It's the tang that gives this dish unique flavor.
Serve at room temperature, sprinkled with parmesan cheese.

Tuesday, June 29, 2010

Stuffed pattypan squash

Down the road from us is a farm with a store that's larger than a farmer's market but smaller than a grocery store. I love shopping there (and usually do so once a week, on average) because they have incredibly fresh fruits and vegetables along with a great selection of gluten-free and organic foods, a homemade baked goods section, and a deli. It's a great place to pick up a gallon of milk or a last-minute something without making the trip to the supermarket.

So the other day they had a basket of patty pan squash, with a sign saying, "OUR OWN!" I couldn't resist them - they're so cute - but especially because you can't get any more local than five minutes away.


Truth be told, I purchased some of these last year, but they went to waste before I could find a recipe to use them in.  That wasn't going to happen this year, so I searched for (and found, on allrecipes.com) this recipe for stuffed pattypan squash.

Since I only had 4 pattypans, I scaled this down a little bit.  You may want and need to do the same, depending on the size of your squash.

Ingredients
6 pattypan squash, stem and blossom removed
6 slices bacon
1/2 cup diced onion
1 1/2 cups soft bread crumbs
1/4 cup freshly grated Parmesan cheese
salt and pepper to taste

Directions
Preheat oven to 350 degrees F (175 degrees C).

Bring one inch of water to a boil in a saucepan over medium-high heat. Add squash, cover, and cook for 10 minutes, or until a fork can pierce the stem with little resistance. Drain, and slice off the top stem of the squash. Use a melon baller to carefully scoop out the centers of the squash. (I used a regular teaspoon.  Worked fine.) Reserve all of the bits of squash.


Place bacon in a large, deep skillet. Cook over medium high heat until evenly brown. Remove bacon to paper towels, and set aside. Saute onion in bacon drippings. Chop the reserved squash pieces, and saute them with the onion for one minute. (My note: I used vegetarian bacon.)


Remove the skillet from heat, and stir in the breadcrumbs. Crumble the bacon, and stir into the stuffing along with the Parmesan cheese. Season to taste with salt and pepper. Stuff each squash to overflowing with the mixture, and place them in a baking dish. Cover the dish loosely with aluminum foil.

Bake for 15 minutes in the preheated oven, or until squash are heated through.

I served this with vegetarian chicken and macaroni and cheese.  Since this was a new dish to try (and I'm happy to report that everyone at the table tried it), I needed something else for us as a backup.  These were pretty tasty!

Monday, June 28, 2010

Black bean salad


This one comes from a good friend—a simple summer side dish that we've been gobbling up for years. When I finally asked for the recipe, I was surprised to find how easy it is to prepare. This black bean salad goes great with just about anything you can throw on the grill, from hamburgers and hot dogs to chicken and steak.

Here's what you need:
2 cans of black beans, rinsed and drained (I used Goya brand)
2 ears of corn
1 small roma tomato, chopped
@ 1/4 of a red onion, finely chopped
@ 2-4 tablespoons fresh cilantro, finely chopped
salt/pepper to taste
Juice of 2 limes
@ a tablespoon of olive oil (optional)

In a large bowl, mix the corn kernels and the black beans.
Add the tomato and onion.

Give it a good stir.
Add the chopped cilantro (I admit to loving cilantro, so I used more rather than less...). Salt and pepper, to taste.
Toss with lime juice, and a bit of olive oil. A word about the dressing: the lime juice is key. You want to taste that fresh citrus when you take a bite. My friend adds a bit of oil when she makes it, but her mom doesn't. It works both ways.

I doubled this recipe for 10 people, and served it with burgers and a pasta salad. There was enough left over for my husband and I to have with our dinner the next night. Enjoy!

Thursday, June 24, 2010

Zucchini and Breadcrumbs

You guys know how it is. Anyone who's ever had a vegetable garden knows how it is.

It is zucchini time.

I am not complaining. Nope. Only two plants grew this year, and still I'm drowning in the stuff. But that's good. It's all good.

Because I have recipes like this one.

Zucchini and Breadcrumbs (adapted from a Cook's Illustrated recipe called Zucchini with Garlic and Lemon)

For the zucchini:
(I'm going to give you the amounts they give, but really...this is one of those "however much zucchini I have on hand, and adjust the rest to taste" recipes.)
5 medium zucchinis, shredded
kosher salt (or table salt if you prefer)
1 clove garlic, minced or pressed
4 teaspoons extra-virgin olive oil
1 to 2 teaspoons fresh lemon juice
ground black pepper

For the breadcrumb topping:
(I also pretty much go by feel on this one, too.)
2 slices of white bread, torn (I often use whole wheat, since that's what we keep in the house; when I'm feeling lazy, I just use processed breadcrumbs. They're not as good, but you already knew that, I bet.)
2 tablespoons butter

To make the zucchini:
1. Shred zucchini on large holes of box grater, or in food processor. Cook's says to avoid shredding seeds and core (which should be discarded), but I'm afraid that's above my fussiness level when cooking.
2. Toss zucchini with a teaspoon or two of salt, and put in a colander to drain for about 10 minutes, if you can. (This is when I either prepare the breadcrumbs or just work on the rest of the meal.)
3. Cook's says to then wrap the zucchini in a kitchen towel (in batches if necessary) to wring out excess moisture. Again, too fussy for me. (They're undoubtedly right, of course, but I just don't have it in me.) I just dab with a paper towel if it's still looking wet, and call it a day.
4. Combine garlic with two of the teaspoons of olive oil in a medium or large bowl; add zucchini; toss to combine, and to break up clumps of zucchini.
5. Heat rest of olive oil in skillet over high heat until faintly smoking. Add zucchini mixture to skillet; spread evenly in pan.
6. Cook without disturbing for a couple of minutes; you want the bottom of the layer of zucchini to brown. Then stir, or flip, or whatever strikes your fancy, and let the new bottom layer brown again.
7. Remove skillet from heat; add lemon juice and salt and pepper to taste.
8. Serve, sprinkling (or, in my case, blanketing) each serving with bread crumbs.

To make the breadcrumb topping (which you should do before or while you're cooking the zucchini):
1. If making your own breadcrumbs, simply pulse your bread in a food processor until...well, until it looks like largish breadcrumbs.
2. Heat butter in skillet over medium-high heat; add breadcrumbs and cook, stirring frequently until golden brown.
3. Put in small bowl and set aside until needed (or put on table so everyone can put as much on as they want!)

And, of course, enjoy! After all, it's zucchini time.

Monday, April 19, 2010

Corn fritters


These are so easy to make and extremely delicious! Corn fritters have been an Easter staple around my husband's family's table for as long as anyone can remember, but they are so good, they deserve to be eaten more often. Yes, they are a perfect accompaniment to ham, but they're also just right to dress up a roast chicken or pork chops. We like to dip ours in applesauce, but you can also serve them plain.

Here's what you need:
2 eggs
1 tablespoon of vegetable oil
1/2 cup of milk
2 cups of flour
salt/pepper
3 teaspoons baking powder
2 cups of corn


Whisk eggs, milk and oil together in a medium sized bowl. Add the dry ingredients and mix well. Stir in the corn. The batter can be mixed ahead of time, if necessary, just cover and refrigerate until you're ready to use it.

In a large frying pan, heat a generous amount of oil (we use canola or vegetable oil; olive oil is too heavy for this). Visually, it should look like you have about 1/4 of an inch of oil in the pan.


Using a tablespoon, drop the batter into the oil. It will spread and flatten much in the same way as a pancake. When the top bubbles (just like a pancake) and the bottom is a nice golden brown, flip it over.


Try to wait until the fritter is really golden on one side before flipping. If you go back and forth too much on these, they will absorb quite a bit of oil, so it's best to be patient and flip once.

These are super delicious hot out of the pan, but also quite good at room temperature.


The batter yields about 2 dozen fritters, depending on size. They also make a nice appetizer, served with a dollop of applesauce or sour cream on top.

Wednesday, February 17, 2010

Mango black bean salsa

This winter weather is just getting me down!  In an effort to deny the existence of the multiple feet of snow just outside my door, I decided to pretend it was summer time this week and made some yummy tropical-inspired salsa.


It's a super simple recipe which requires only a few ingredients.  Here's what you'll need:


2 ripe mangos
1 small can crushed pineapple
1 small can black beans
1 red onion
red chile powder or the crushed chiles of your choice (I used Asian chiles with a rating of 15k-30k Scovilles)
cilantro (optional)

Ok, now, follow closely —it gets complicated (not)...

Dice the onion
Peel and cube mangos.  Mash the cubes with a fork (or a pastry blender, as I did)
Open the can of pineapple.
Open the beans then rinse and drain them.

Dump everything together in a mixing bowl and add chiles or chile powder to taste.  Mix well then cover and refrigerate for a couple of hours to allow the flavors to infuse.  Just before serving, tear a generous handful of cilantro and stir it in.

Don't be afraid to experiment with the ingredients —subsitute canned or fresh for any of the ingredients.  I prefer fresh mangos over prepackaged; I think they have a nuttier flavor and aren't as sugary.

If you're not afraid of hot stuff, use this salsa straight out of the bowl as a dip for chips.  Spoon it over fish or chicken before baking for a succulent and hearty main course, or warm it in the oven for a sweet and spicy side dish.  Toss in some extra black beans and serve it with rice and you've got a tasty vegetarian main course.


Please pass me the pitcher of margaritas!

Wednesday, January 27, 2010

Oven roasted rosemary potatoes

I wish I had some interesting story to tell you about how I first tried these at so-and-so's restaurant (I did not) or how my mother used to make these every Sunday (she did not).  Alas, I've got nothing for you.  Just some yummy potatoes which are so easy to make (no matter how you do them) and are so versatile that you can substitute just about any seasoning you want to complement any meal or to satisfy any taste.

Here's how I made them (this week):


Ingredients:
6 medium red potatoes
2 tablespoons dried rosemary
olive oil
sea salt

The 18-minute version:

Preheat oven to 400F.  Wash potatoes and cut into chunks approximately 1 to 1 1/2 inches large.

Using a mortar and pestle or a small burr grinder, grind up the rosemary just enough to release the oils and flavor.

Place potatoes into a microwaveable bowl or casserole.  Drizzle with olive oil.  Add rosemary and sea salt, to taste, and stir the potatoes to spread the mixture evenly.

Cover dish with plastic wrap and microwave on high for approximately 8 minutes until almost completely cooked. Potatoes are cooked when they can be pierced with a fork.

Transfer potatoes to a shallow baking dish or cookie sheet.  Brown in oven for 10 minutes or until golden crust begins to form on the potatoes.

Serve piping hot and enjoy!

The 45-minute version

Preheat oven to 400F. Wash potatoes and cut into chunks approximately 1 to 1 1/2 inches large.


Using a mortar and pestle or a small burr grinder, grind up the rosemary just enough to release the oils and flavor. Add rosemary and sea salt, to taste, and stir the potatoes to spread the mixture evenly.


Put the potatoes, oilve oil, rosemary and sea salt (to taste) in a plastic food storage bag.  Seal it and shake to coat evenly.

Transfer potatoes to a shallow baking dish or cookie sheet. Bake in oven for 45 minutes or until golden crust begins to form on the potatoes.  They are done when the potatoes can be pierced with a fork.


Serve piping hot and enjoy!
 
Footnote:
Now, you may be asking yourself why I would go to the trouble of microwaving the potatoes when I can just roast them in the oven.  Two reasons, actually.  First, I don't always have the time to get the oven ready with enough lead time for preheating and cooking for 45 minutes.  I can set the oven to preheat while I'm mixing and microwaving and then toss it all into the oven to brown away while I am giving Nik his dinner.  Second, I like my potatoes a bit moister than I think they come out when cooked in the oven for so long.
 
Another plus to the shorter method is that they can be cooked ahead of time —say the night before I want to serve them— and baked/browned in the oven the next day.  If I cook them completely and then have to store them in the fridge, they get kind of mushy and I end up having to re-brown them anyway.

Wednesday, January 20, 2010

Savory ricotta, onion and bacon tart

Weekdays are so busy with caring for Nik that on the weekends, when my husband is home and I get some breathing room, I just want to create.  I'm not sure what prompted me to decide to make a tart this weekend; I've never made a tart in my life.  Yeah, I'm a little crazy like that sometimes, I guess, but the bug had bitten so I was off and running.  Besides, it was the perfect excuse to go out and buy myself a tart pan!

Did I bother to look at any recipes? Nope.  Well, okay, one recipe —my great-grandmother's pie crust recipe; I substituted my gluten free sorghum flour blend and it came out fine.  The color isn't as golden as a traditional wheat-based flour crust would be but it was tasy and had a good texture to it.

I knew I wanted to keep the tart simple, in terms of ingredients, but wanted it layered with complementary flavors.  I decided on a simple ricotta cheese base with a few ingredients and seasonings added on top.  Kind of like a "white pizza" but on a pie crust. (Hey, roll with me here, okay?)

I have to say, I think it turned out well for my first foray into the land of tarts.  My husband loved it!  There were no leftovers remaining after lunch the next day and he's already asked me when I'm making another one.  My answer? Probably soon; it's so darn easy to make!

The ingredients and recipe for the crust:

1/2 cups flour (I used a GF sorghum blend.*)
1/2 teaspoon salt
1/2 cup shortening (I used palm shortening. You could use Crisco, margarine or butter.)
4 to 6 tablesppons cold water
* 1/2 teaspoon xanthan gum (ONLY for GF flour) (gives dough elasticity)

Mix dry ingredients together in mixing bowl. Using either a pastry blender or two knives, cut in shortening until the mixture is the consistency of lumpy corn meal.  (NB: you may use your hands for this but it gets pretty messy!)  Add 4 tablespoons cold water until the dough is a soft pasty consistency with which you can clean the sides of the bowl.  If it's too dry add more water a little at a time until you get the right feel.  If it's too wet simply add a bit more flour.

Form dough into a soft ball.  Roll the dough into a medium sized circle. Place the dough in the tart pan, pressing the dough to the edges and creating a slightly raised edge.  You want it high enough to hold the ingredients you will add after you bake the shell. 


Bake at 350F for approximately 12 minutes.  Remove from oven and allow to cool in the pan.  Tart should be cool enough to touch the pan with your bare hand before adding the filling. Do not remove the shell from the pan.

Filling ingredients:
[NB: These measurements are approximate; I did not actually measure as I concocted.]


1 cup ricotta cheese (Use regular fat, not skim. Skim will make the filling very dry.)
1 cup diced tomato
1cup sliced mushrooms
1/2 onion, shaved or very thinly sliced
5 to 6 slices cooked bacon, crumbled in large bits
1/4 to 1/2 cup romano or asiago cheese, finely shredded
1 Mrs. Dash Garlic & Herb blend (You can sub equal parts oregano and garlic powder)
black pepper to taste

In mixing bowl, blend ricotta, oregano and pepper.  You may add bacon if you want it throughout the tart.  Spoon seasoned ricotta into the cooled tart shell.  Layer tomatoes, onions, bacon and mushrooms on top in any fashion you wish.  Top with shredded romano/asiago.


Bake at 350F for approximately 30 minutes or until the cheese on top is melted and lightly golden brown.  Remove from the oven and allow to cool approximately 10 minutes before serving.


Makes a nice light main dish which goes perfectly with a spinach or caesar salad.  Or serve it as a side dish with something like Kristen's braised chicken with artichoke hearts.  Either way, you can't go wrong.

The beauty of this non-recipe is that you can really take it and play with it to make it your very own. Don't like mushrooms? Leave them out. Adore bacon? Add as much as you like.  Try it with cottage cheese if you don't have ricotta.  Top it with cheddar.  Mmm, layer sliced potatoes and bacon with cheddar and chives and you've got your very own potato skins tart! Garnish with sour cream for a yummy Super Bowl party snack! 

The possibilities are limited only by your taste and creativity.  Enjoy!

Thursday, December 10, 2009

Let's Talk Latkes

The first night of Hanukkah is...yikes!...tomorrow. Friday, December 11th. Did I mention YIKES?

I mean, sure, I'm not ready present-wise. And I don't have enough candles to get us through more than a day or two. (Especially since we light a minimum of three menorahs: one is mine and Baroy's, one is Em's, one is N's.) But, really, that yikes is about latkes. Specifically, the fact that I don't know when I'm going to be able to make them. And IT IS NOT HANUKKAH until I have eaten myself sick on latkes. Latkes that I have made myself. With applesauce that I have made myself.

(Yes. It's all about me.)

But, hey. The fact that I'm so overwhelmed by life that I haven't managed to schedule the making of latkes, much less done any actual making of latkes...that shouldn't impact you guys. Or at least not beyond the lack of cool latke-related photos on this post. (Sorry.)

And so, let's talk latkes.

Now, making latkes? Ridiculously easy. There are fancy latke recipes out there (relatively speaking), but me, I'm a simple kind of gal. In fact, you can't even really call this a recipe; what follows is really a list of obvious ingredients, and some tips on how to make the process of latke-izing as painless (and delicious) as possible.

Latkes =
potatoes
onion
egg
flour
salt
pepper (optional)
oil

OK. So. First, let's talk potatoes. I am almost embarrassed to admit that, until a year or so ago, it never occurred to me that there was an easier way to do latkes than the spend-seventeen-hour-peeling-russets routine. Now? I'm all about the Yukon golds, or just plain old white potatoes. Because, dude! You don't have to peel! The skins on these potatoes are so thin, you can just grate them into the batter along with the potatoes themselves (after cleaning well, of course). It cuts the latke-making time down to almost nothing! Trust me. It's totally worth it.

Now, let's talk proportions. My mom taught me to make latkes, and she told me to use a more-or-less four-to-one ratio of potatoes to onions. But the potatoes she used were huge russets, whereas the potatoes I use, well, we just talked about that. So I just sort of eye it; I probably use about one small onion (or half of a larger one) for every six to eight potatoes I put through the food processor.

On to the actual making. First, wash the potatoes. Next, grate them. What I do is put a bunch of potatoes and the onion through the grater apparatus on my food processor, then put aside about half of the coarsely grated mixture into a collander, so the liquid can drip off and the batter will be less runny. I take the other half and put it through the food processor again, using the blender blade (if that's what it's called, the blade that sits on the bottom of the mixing bowl) to turn that half of the batch almost into a puree.

Once that's done, mix the two halves of the potato-onion batter together in a large bowl, adding in one already-beaten egg.

Next, add enough flour to firm up the batter, and then season with kosher salt (I prefer kosher salt for cooking) and pepper (if you like to give your latkes a little kick) to taste.

As you're doing these last couple of steps, you'll want heat a quarter-inch or so of oil (the more neutral the oil, the better; I prefer canola) in one or more skillets. When the oil is hot, drop the batter in by large spoonfuls; turn the latkes once, when the edges start to brown, adding more oil as needed.

Remove cooked latkes from skillet and place on a plate or platter lined with at least two layers of paper towel; cover each single layer of latkes with another layer or two of paper towels, to soak up excess oil. Serve hot, or freeze in single layers on cookie sheets lined with wax paper; once the latkes are frozen, they can be put into plastic bags and stored pretty much indefinitely. (God, I wish I'd done this a few weeks ago. I'd be all ready now!) When you're ready to serve them, pop them into the oven on the same cookie sheets at 300 degrees or so, until warm and crisp.

And that's pretty much it. Or, rather, that's almost it.

If you know anything about latkes, you know what I'm going to ask: Applesauce, sour cream, or both? You already know my answer. (And no, it's not "both." One does not adulterate the perfection that is homemade applesauce...not even with the creamy near-perfection of sour cream.) But you might (I shudder to think) have a different opinion. And so I ask...When it comes to latke accompaniment, what's your pleasure?

And to all who celebrate, via latkes, presents, or prayers: Happy Hanukkah. May your days and nights be a feast of lights.

Monday, November 30, 2009

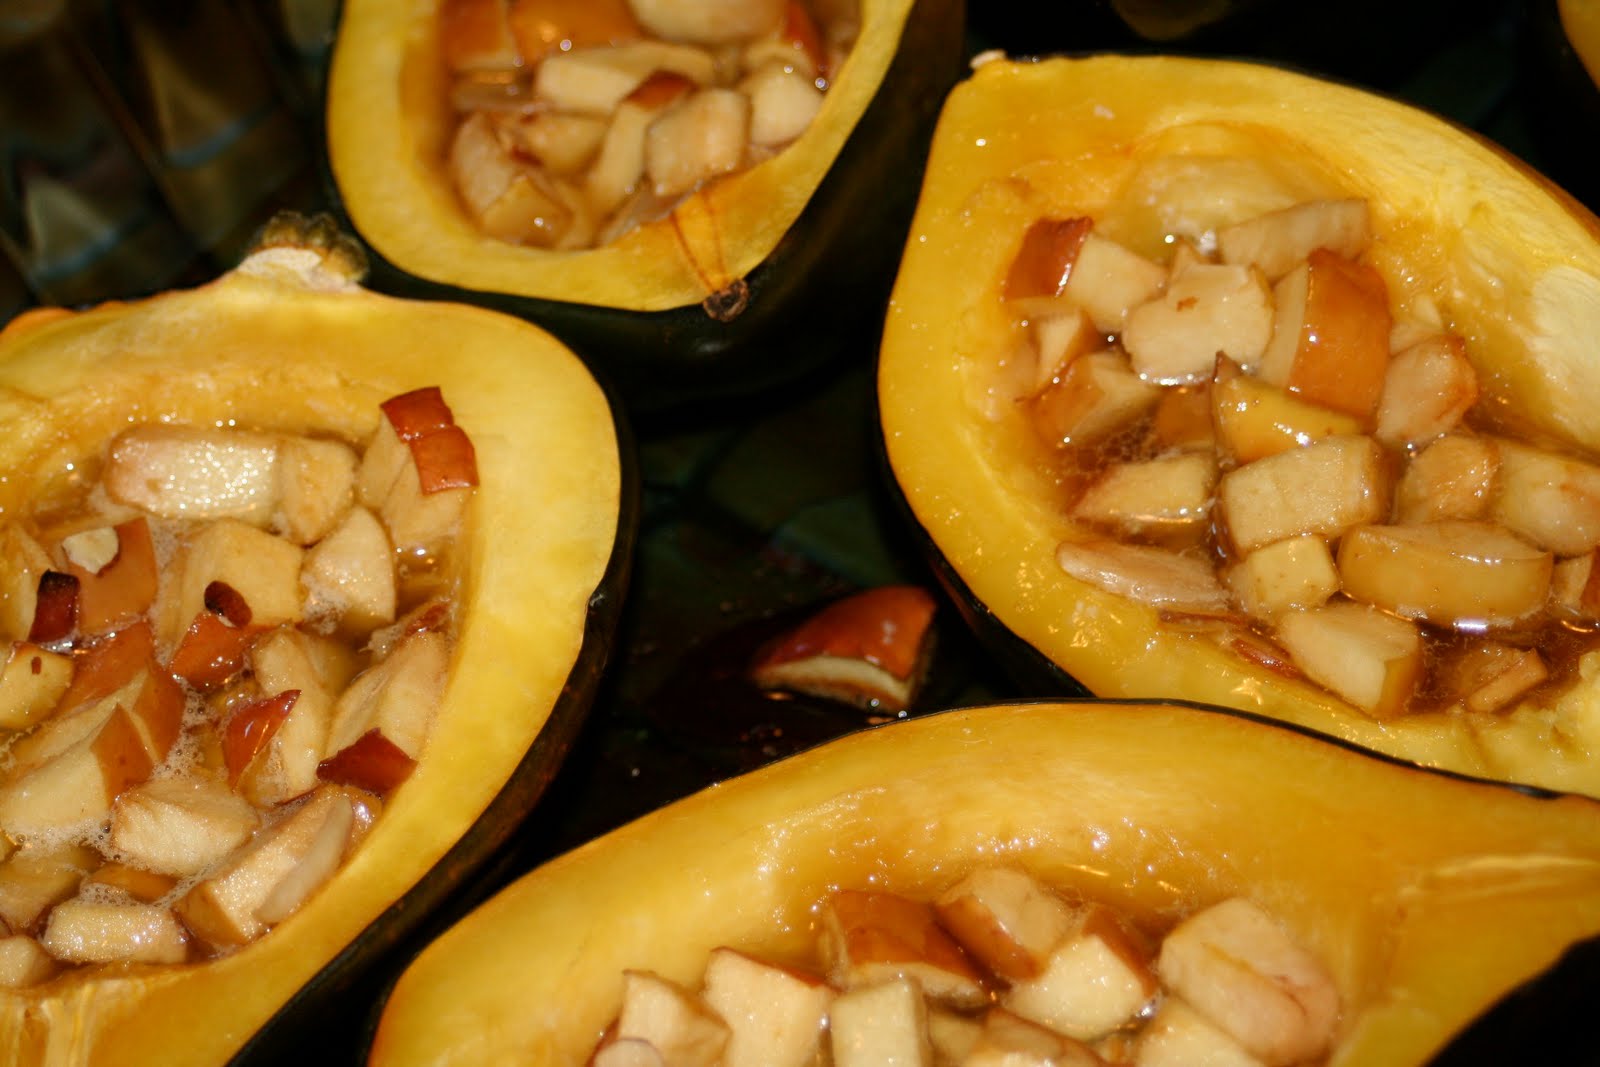
Acorn squash with apple stuffing

I really love squash. So when I was looking for something to replace sweet potatoes at our Thanksgiving table this year, I decided to go with acorn squash. It's not that I don't like sweet potatoes, I do. But the thing about Thanksgiving is this: the turkey is a given. The stuffing, a must-have. So when it comes to the other sides, I like to change things around from year to year.

This recipe was really easy to execute and it's certainly one that can be improvised depending on what you have on hand. It was delicious with the turkey, but I also think it would pair nicely with pork. Here's what you need to get started:

2 acorn squash
2-3 apples, chopped
approximately 3-4 tablespoons of brown sugar (depends how sweet you want it)
dash of cinammon
dash of nutmeg
small handful of sliced almonds (or nuts of your choice)
butter

Wash the squash and then cut each in half, lengthwise. Scoop out the seeds and fibers.


Place the squash face down in a baking dish that has about an inch of water in the bottom. Bake at 400 degrees for about 30 minutes.


While the squash is baking, wash and chop the apples. Stir in the brown sugar, cinnamon, nutmeg and nuts. Set aside.


When the squash come out of the oven, turn them over and fill with the apple mixture. Top each with a pat (or two!) of butter and return to the oven for another 30 minutes.


Enjoy!


Wednesday, November 25, 2009

Crackling Cauliflower

I'm big into tradition. Something about the tried and true really speaks to me, makes me feel warm, makes me feel secure. And so my Thanksgiving table will look like a lot of Thanksgiving tables around the country, with turkey, gravy, stuffing, cranberry sauce, sweet potatoes, mashed potatoes...you expect it, we'll have it.

But, at the same time, I like to spice things up a little bit every now and then. And this year, I'm going to spice them up with cauliflower.

Cauliflower? I can hear you snicker from here. Oh, ye of little faith. Pull up a chair, and let me tell you a little bit about how cauliflower--this cauliflower--can totally ROCK your Thanksgiving table.

A quick note on this recipe: A friend sent it to me--well, actually, to a mailing list I've been part of for almost a decade--earlier this year, and it immediately became my go-to potluck (and now Thanksgiving) recipe, with a few modifications, which I'll note below. My friend, in turn, got it from The Whole Foods Market Cookbook. So it's a little bit of a 'telephone' recipe, having undergone more than one pass-along to get to you. I don't think it's any the worse for wear, though!

Crackling Cauliflower

2 heads of cauliflower, cut into florets [The original recipe had 1 large head or about 6 cups, but I didn't think that made enough for my purposes, so I more-or-less doubled the cauliflower, and then upped the amounts of the rest of the recipe. I'm giving you those upped amounts below.]

1-1/2 cup diced red onions [I've used both white and yellow onions as well, and they've been fine.]

1/2 cup canola oil

1 Tablespoon curry powder

1 Tablespoon garam masala

1 Tablespoon fennel seeds [The first time I made this, I only had anise seed, and it turned out fine. There is a difference, but it's not enough to make a big impact on this recipe.]

1/4 teaspoon crushed red chili flakes [I didn't up this amount, because I'm not a big fan of this kind of heat; you may want to double it.]

1 Tablespoon salt [This is actually a somewhat salty recipe; you may want to start with less, and add more later if you feel it needs it. This actually goes for all the spices here; it's a pretty spicy recipe, and you may personally want to tone it down a bit.]

4 large garlic cloves, minced

2 Tablespoons grated fresh ginger

1 Tablespoon grated lemon zest [My friend says she never bothers with this, but since I have lemons growing in my backyard, I usually include it. I definitely don't think this is a do-or-die ingredient.]

2 teaspoons freshly ground pepper

1 cup frozen peas, thawed

1/4-1/2 cup chopped fresh cilantro

Preheat oven to 400 F.

Put everything except peas and cilantro in a large bowl and toss until the cauliflower with the rest of the ingredients.

Pour into a large baking pan and roast for 30-45 minutes, until the cauliflower is crisp-tender and golden-brown, turning the cauliflower every 10 minutes or so, so that it will cook evenly. (The original recipe says to cook for only 25-30 minutes, but I don't think that's enough, especially when you double the recipe. I also don't find that it browns quite so much, though it does pick up a yellow hue from the spices. Your mileage may vary.)

When done, place the cauliflower in a large serving bowl. Mix in the peas and cilantro, and serve. Watch everyone's socks get knocked off.

So, that should pretty much do it for our first Thanksgiving here at (Never) Too Many Cooks. (Well, almost. Check in tomorrow for the great leftovers recipe Niksmom's been taunting me with, but refusing to give me in advance. Brat.) Please let us know what you try, what you like, what you think. Actually, let us know about anything you put on your table that shakes things up, even if it didn't come from here.

We're all ears. (And tongues and lips and jaws and teeth and bulging bellies...)

Tuesday, November 24, 2009

Sweet potato souffle

I have a embarrassingly funny sweet potato story.

Growing up I swore I didn't like sweet potatoes. Truthfully, though, I never tried them. Orange potatoes? Ick, I thought.

When I was about 25-26, it was November and at work we were having a department lunch meeting. I grabbed a piece of pumpkin pie and was noshing away. Hmm, this tastes different.

So I comment, out loud, to everyone, "This is the funniest tasting pumpkin pie I've ever had."

The crotchety old department secretary pipes up (equally as loud), "That's because you're eating sweet potato pie."

The rooms bursts into laughter. I turned 3 shades of red!

But I've been a fan of sweet potatoes ever since!!

This is
arguably my favorite Thanksgiving side dish (squash casserole runs a close second). I always want to make an extra batch to ensure that there is plenty for leftovers the next day.

Sweet Potato Souffle

2 lbs mashed sweet potatoes (about 3 cups)
1/4 tsp cinnamon
1/4 cup butter, softened
1 tsp vanilla
1/2 tsp salt
1/4 tsp nutmeg
2 eggs
1/2 cup sugar

Topping
1/4 cup butter, softened
3 Tbsp flour*
1/2 cup brown sugar
1 cup chopped pecan

Preheat oven to 350.

With a mixer, mix all of the souffle ingredients together and place in a 2 quart souffle dish.

Mix topping ingredients together and sprinkle on top of souffle.

Bake for 30-35 minutes.

*For a gluten-free version of the nut topping, use an all-purpose gluten-free baking flour. I have not ever done this, but I'm going to give it a try. If you'd like a tested GF nut topping recipe, click here: All-Purpose Crumb Topping. (I have not tried it, but I've never been disappointed in any of her recipes.)

To make recipe dairy free, substitute dairy free buttery spread in place of the butter.

Friday, November 20, 2009

Green beans with shiitake mushrooms

I have never, ever (ever!) liked the traditional green bean casserole served so often during the holiday season. You know, the one with the French fried onions and cream of mushroom soup? Maybe it's the tradition part that makes it a favorite with some. Most of my life I just skipped eating green beans at Thanksgiving.

The one and only year I've ever had a subscription to Bon Appetit magazine was the first year I was married. And that year they offered up this gem of a recipe for green beans with shiitake mushrooms.

I hosted that year (my first-time ever doing that) and without hesitation I ousted the traditional green bean casserole and made this instead.

We have never looked back. Everyone loved it. Fresh green beans, fresh shiitake mushrooms, butter. It is delightful.

This dish cooks fairly quickly. It's usually the last thing I make so I can serve it hot with the green beans still crisp.

Green Beans with Shiitake Mushrooms
3/4 stick (6 tbsp) butter*
8 oz fresh shiitake mushrooms, stemmed, caps sliced
2 shallots, chopped
2 garlic cloves, minced
2 lbs slender green beans, trimmed
2/3 cup low-sodium chicken broth

Melt 3 tablespoons butter in large nonstick skillet over medium-high heat.
Add shiitake mushrooms and saute until tender, about 5 minutes.
Transfer mushrooms to medium bowl.
Melt remaining 3 tablespoons butter in same skillet.
Add shallots and garlic and saute until tender, about 2 minutes.
Add green beans and toss to coat with butter.
Pour broth over green bean mixture.
Cover and simmer until liquid evaporates and green beans are crisp-tender, about 10 minutes.
Stir in shiitake mushrooms.
Season to taste with salt and pepper.
Best if served immediately.


image from epicurious.com

*This year I will be using Earth Balance soy free natural buttery spread in place of butter, making this meal dairy-free. It's naturally gluten-free assuming a gluten-free chicken broth is used.

Thursday, November 19, 2009

Cranberry sauce you'll gobble up

This cranberry sauce? Right up there? Oh my god, you guys. This sauce is awesome.

Now, I could do a whole intro-to-the-recipe thing about how I never liked cranberries, but when I first got married and started making Thanksgiving dinners, I felt like it was important to include as many traditional foods as possible, and how I found this particular recipe in Sunset magazine (which I used to be completely in love with, despite there being essentially no relationship between it and the reality of my life) and tried it because it was one of the few recipes they had that didn't involve some technique or ingredient I'd never heard of, and then fell completely in love, said love being eclipsed, however, by Baroy's love for it. (He eats it by the heaping tablespoon, all by itself.) But I'm not going to tell that story...OK, I'm not going to tell any MORE of that story.

Instead, I'm just going to say this: Cranberry sauce can be something more than an overlooked, out-of-the-can accompaniment to the turkey and a potential stain on that special white linen tablecloth. No, seriously. This stuff? It's goooood. It's noticeably, ridiculously good. (I blame the vanilla. Actually, I'm pretty much convinced that anything with vanilla in it can't actually taste bad. But maybe that's just me.)

Cranberry Sauce (adapted from Sunset magazine, November 1995; Sunset adapted it from a recipe given to them by the folks at the Lark Creek Inn in Northern California)

2 bags of cranberries (24 ounces total, or 6 cups)
2/3 cup granulated sugar
2/3 cup brown sugar, firmly packed
1/2 cup orange juice
1 Tablespoon lemon juice
1/8 teaspoon ground cinnamon
1 Tablespoon vanilla

First, a disclaimer. Because of how much my family adores this cranberry sauce, and because we often have a dozen or more people to Thanksgiving dinner, I usually make three or four bags of cranberries, increasing the amounts of the ingredients as needed, and then tweaking them to taste. (By the way, you can use either fresh or frozen cranberries for this sauce. I tend to buy them fresh(ish) in a bag; I buy a whole bunch and freeze the ones I won't use for Thanksgiving for future dinners.)

Second, an explanation. We live in Southern California. There are two prolific lemon trees in my backyard. I am cheap. Hence, the mere idea of buying lemon juice makes me die a little inside. Instead, when the trees are bearing fruit, I make sure to juice as many of the ripe lemons as possible before they go bad, and then I freeze whatever juice I don't use immediately into little citrusy ice cubes. So, those orange ice-cube trays up there? Are my equivalent of store-bought lemons or lemon juice. Unless you live nearby, your mileage will probably vary.

Now, on with the instructions:

1. Put cranberries, both kinds of sugar, orange and lemon juices, and cinnamon into a pot; bring all to a simmer.

2. Simmer, uncovered, stirring occasionally. The cranberries will (and should) start to burst open. Keep simmering and keep stirring until most if not all of the cranberries have 'popped.' The recipe says this takes 8 to 10 minutes; I don't think I've ever timed it, but I feel like it might take a little bit longer.

3. Turn off heat; take pot off burner. Stir in vanilla.

And you're done. This can be served warm (which is definitely the way I prefer it, but we've already discussed this), or it can be made ahead, chilled in the fridge in an airtight container, and served within a week.

Now that I've shown you mine, hows about you guys showing me yours: What's your favorite traditional recipe for Thanksgiving, and what do you do to it to kick it into high gear? Or, if you scoff at traditional anything, what's your favorite non-traditional Thanksgiving recipe? Spill. Now. Please? I'd be ever so thankful...

Thursday, November 12, 2009

Biscuits...and more biscuits

There's almost nothing I love more than hot, fresh, home-made bread, straight out of the oven. Challah. Whole wheat. A crispy-crusted French loaf.

But fresh-baked bread and a 9-5ish job? Not even a bread machine can make those sorts of yeasty dreams come true on a regular basis.

Which is why I've become the ultimate biscuit fan. OK, sure. Technically? No yeast. But they're warm and flour-y, they make the house smell good, and my kids squeal with delight when they're on the menu. Plus? I can make them from scratch and still have them on the table in under half an hour.

Can you say the same thing, bread? I didn't think so.

Score one for the previously guilt-ridden working mom.

With Thanksgiving coming up, I thought this little ode to the biscuit would be especially appropriate. Because really, who has time to knead dough and let it rise when you've got a turkey to brine? (What? You don't brine? I'm a total convert, thanks to Alton Brown and the Food Network. Also, I'm a total masochist. But that's a subject for my other blog.)

And, just to raise the ante a bit, I'm going to throw two different biscuit recipes your way. The first is one I just tried for the first time last week, after seeing it in the weekly recipe-laden email the Cook's Illustrated/America's Test Kitchen folks sent to me. (By the way. Cook's Illustrated = best cooking magazine ever. Hands down. Yes, I do have opinions, thank you very much. And since you asked, go for the online subscription. The archives are incredible.) The second is from my go-to cookbook, The Joy of Cooking. And having made them both within a couple of days of one another, I have to tell you...they're both scrumptious. Try one, try both. There's no such thing as too many biscuits.

Cream Biscuits (adapted from America's Test Kitchen video recipe)

2 cups flour (no reason--ever, that I can think of--to get bleached flour, folks; go for the all-purpose unbleached)
1 teaspoon baking powder
2 teaspoons sugar
1/2 teaspoon salt
approximately 1-1/4 cups heavy cream

The ATK folks like these biscuits because they're really easy to throw together, what with not having any butter to cut in and worry about lying around in too-big chunks. Personally, I don't think there's such a thing as a too-big chunk of butter, but, you know, different strokes and all that. What *I* liked about this recipe is how truly creamy and rich and yet flaky the biscuits were.

Here's how to get them that way:

1. Preheat oven to 425 degrees.

2. Mix all the dry ingredients together, then add heavy cream a little at a time, until the mixture is fully wet.

3. Take the dough out of the bowl, and knead it for 20 to 30 seconds on a floured surface. Unlike most biscuits, you can actually treat this dough pretty roughly; I probably kneaded for more like a minute, and it was just fine.

4. The ATK folks then suggest putting the dough into an 8-inch cake pan, spreading it out, turning the pan upside down and dumping it on the countertop, then cutting out the biscuits with a biscuit cutter. Me? I hate washing more dishes than I need to, so I just smoothed it out on the same board where I'd kneaded it and cut it with a round cookie cutter.

5. Place on baking sheet with parchment paper (I'll second Kristen's insistence that it's the only way to go when you're baking), and bake for 425 degrees for about 15 minutes. Serve warm. With real butter. (Or whatever you want. I just love real butter.)

Quick Drop Biscuits (from The Joy of Cooking)

These are based on a more 'conventional' basic rolled biscuit recipe in the book, but I've never been one to care about my biscuits looking all smooth and uniform, and drop biscuits get into the oven and thus into my belly more quickly than do those that require rolling out and cutting. No contest!

2 cups all-purpose flour (another plug for unbleached)
2-1/2 teaspoons baking powder
1/2 to 3/4 teaspoon salt
6 Tablespoons unsalted butter, cut into smallish pieces
1 cup milk

1. Preheat oven to 45o degrees.

2. Whisk together flour, baking powder, salt, then add the butter, cutting it with knives or a pastry blender until the butter is in pea-sized (or smaller) flour-coated pieces. You don't want the butter to melt or get pasty.

3. Add all the milk at once, mixing it into the dry ingredients with a wooden spoon or rubber spatula until everything is moist and sticky, but not smooth.

4. Drop golf-ball-sized teaspoons of the batter onto a baking sheet lined (yes, another plug) with parchment, spacing the biscuits an inch or more apart.

5. Bake for about 12 minutes, until the bottoms and the spiky peaks on top are nice and golden brown. Serve warm and, need I say? With butter. Mmmmmmmmmm.

So now I'm wondering...Do any of you have a strong preference when it comes to these sorts of things? Like, do some of you really hate the idea of a biscuit whose top is spiky rather than smooth? Are any of you turning up your nose at the idea of a biscuit made without butter? Do biscuits turn you off entirely, being heavier than their various yeasty cousins? I'd love to hear what you think.

Monday, November 9, 2009

Rice with vermicelli


You know how Italian families grow up on pasta? I grew up on rice. And I could still eat rice every night of the week. I love it, in all its countless incarnations. But the rice I love best is this rice, the rice I'm going to show you how to make today. It's the rice my mother makes, the one she learned to make from her mother, who learned from her mother, and so on and so on.

Every once in a while I'll stumble upon this rice in a Greek restaurant or a Middle Eastern restaurant, and I'll think, yes, just like home. Because that's what this rice is to me: home.

There are a couple things you need to know up front. First of all, we're going to use butter. And if we were truly being authentic, we would use rendered butter, but honestly, I never have figured out how to actually do that. Second, (and this one is non-negotiable) we need to use Uncle Ben's Converted Rice. No wild rice or sushi rice or brown rice or Carolina rice. God forbid—no instant rice. Uncle Ben's Converted Rice in the orange box.

Here's what you need to make about 4 servings (after double-checking with my mom, we decided it would be important to add that this will make 4 small side-dish size servings. We all love rice so much, that honestly, if we were really going to have four adults sitting down to dinner, I'd double it.)
  • 2-3 tablespoons of butter
  • @ a handful of thin vermicelli noodles
  • 1 cup of Uncle Ben's Converted rice
  • 2 cups of VERY hot water (the ratio is always 2 cups of liquid for every 1 cup of rice; so if you want to double the recipe, you would need 4 cups of water, 2 cups of rice)
  • salt
Melt the butter in a heavy saucepan.


Add the vermicelli. If you are using coiled vermicelli, break it apart so it looks like this:


Brown the vermicelli, stirring often. When the color is good, add the rice and stir everything around.


You want the rice coated in the butter. Now add the hot water. Add the water slowly, it's going to sizzle and spit because the pan is hot and the water is hot, so stand back a bit and watch the steam. Add some salt. Be generous. It won't hurt you.


Bring the liquid to a bowl and cover the pan. Simmer for about 20 minutes or until all the liquid is absorbed.

Now, this is important: Do NOT stir. Do NOT peek. Put the lid on the pan, turn the heat down to simmer and walk away. Set a timer, or watch the clock. When the liquid is gone, the rice is done.


If you want to add a little Middle Eastern flavor, sprinkle some cinnamon on top before you serve it.

I think this rice is delicious plain, but there are so many ways you can vary the recipe. You can certainly use chicken broth instead of water; you can add slivered almonds or toasted pine nuts or golden raisins, or top it with a bit of Greek yogurt or lebne. And it's a great accompaniment to everything from shish kebab to fish. It's a real favorite in our house.

How do you make rice? (On top of the stove? Rice cooker? Microwave?) What's your foolproof method?

Printfriendly